 As an amateur electric guitarist, one eventually begins to seek a better sound. Tube amps are supposed to be the bomb, right? Well, some time ago, I bought a Blackheart Little Giant 5 amp, used. It’s a single-channel 5W, single-ended, class A amp powered by an EL84 and voiced through a 12AX7 preamp tube. Not a bad sounding amp at low volumes, with some crunch at high volumes. Not a lot of clean headroom, but not bad either substituting a JJ 12AU7 in place of the original 12AX7, which to my ear gave it lower gain (volume), but not much and warmed up the tone significantly, with boosted low end. I also replaced the original EL84 and replaced it with a JJ EL84, which made the tone less harsh to my ear. Your mileage, of course, may vary.
I had the amp plugged into an open-back cabinet with a cheaper Celestion 12-inch speaker. Sound == crummy, where crummy is harsh, jarring, ice-picky and overall ragged, with almost no bottom end. The speaker almost sounded blown. I thought I’d fix it by buying a new speaker and ended up with an Eminence “The Governor,” which is supposed to work for both open- and closed-back scenarios.
“The Governor” has a lot of mids (some say it’s a good match for a Celestion Veteran 30) with a tight bottom end. After mounting it and hooking it up, the speaker still sounded ragged, almost blown at times–I call it “flubby”–in that open backed cabinet. It just sounded like a big fart factory, IMHO (“Hated it…”) It was not in any way endearing, so I began to shop for a cabinet, but didn’t really want to spend $300-500 on a nice cabinet after already spending ~$100 on a new speaker.
Purpose
For my purposes, if I play publicly, it’s in venues where mic’ing is the primary form of amplification. But my primary purpose for this rig is recording. Hence the small-wattage amp and single speaker combo. For these purposes, I like the design of the Mesa Boogie Wide Body Closed-Back cabinet, but was afraid that my “The Governor” speaker wouldn’t sound as good if I replicated the cabinet size exactly, if I was going to build my own.
Enter Speaker Design
Leveraging some of my old hi-fi speaker design books (I built a set of stereo speakers in high school) and the Google, I created a spreadsheet of calculations based on the Small & Thiele parameters of the Eminence speaker (you can download it here). Sure enough, based on my calculations “The Governor” is best in a ported speaker cabinet, with an EBP of 171 (see column D8 of the spreadsheet). You can input your own speaker parameters into it and have things recalculate for you, but the spreadsheet wasn’t really designed to be clear, concise and consumer friendly. It worked for me, but use at your own risk!
As I intended to use standard lumber of 1″ x 12″ for the outside of the box, this dictated the depth of the cabinet to approximately 11 1/2″ deep (note my inexperience with standard lumber sizes as it turns out a 1×12 is more like 3/4″ x 11 3/8, not width of 11-1/2. Close ’nuff being only an eighth of an inch off). After mucking about with frequencies, tunings and box sizes I narrowed in on a size of 11 1/2″ deep x 22 1/2″ wide x 16 1/2″ high (outside dimensions). With a port size of 3 1/4″ x 7 5/16″ (approximate area of 23.7583″) and the inside the box volume of 1.83 cubic feet, I’d have a cabinet tuned for my “The Governor” speaker with a cutoff frequency below 82.41 herz, which is the frequency of the low-E string. Amazingly enough, it came out really close (though not exact) to the size of the Mesa cabinet measurements listed on Mesa-Boogie site… that gave me some confidence to start cutting.
The Materials
Most cabinets these days are made of void-free birch plywood. However, that’s $50 or so per 4×8 sheet, and I didn’t need that much wood. Plus, the old classic cabinets, like the Fender and Marshall, were originally constructed of solid pine, reportedly. Pine is cheap. Pine is supposed to also add a nice, round, warm tone. And since I’m not a traveling musician, I decided to go the cheap, er… “classic” route, using plywood only for the front baffle and back of the cabinet.
Here’s a list of the wood that I used as a shopping list (at Home Depot):
- 1 – 1x12x8 common pine board (outside of cabinet).
- 1 – 1x3x6 common pine board (to rip for furring strips inside cabinet). Should have used plywood or hardwood instead.
- 1 – 24×48 birch plywood scrap, sanded (front and back baffles).
Other than that I used:
- wood glue
- 1-1/4″ drywall screws
- flat black spray paint
- spray adhesive (for holding the grill cloth in place)
- staples (to back-up the glue on the grill cloth)
- polyurethane
- 1 tube clear caulking
- a bunch of c-nuts (due to my mistake of pre-drilling the back furring strips)
- cabinet hardware: handle, rubber feet, finish screws and washers, speaker cloth.
Tools used (Tim “the tool man” Taylor would be proud):
- Drill and bits
- Table saw
- Circular saw (for ripping the plywood)
- Router
- Staple gun (for grill cloth)
- Belt sander (to even out the box joints)
- Finishing sander (used 400 grit to smooth out the wood and finish between coats)
- Makita screw driver (and hand one also)
- Countersink bit
- Miter saw (for cutting the firring strips accurately)
- Sabre saw (for cutting out speaker hole and port)
- Wood rasp (for evening out the sabre saw cuts)
- Sanding block
- Hammer (for seating the c-nuts)
- Wood plane (for reducing the width of the front baffle ever-so-slightly to account for the grill cloth)
Putting it Together
Ok. So enough talk already! Let’s get to the implementation…
The first step is to create the outside of the cabinet. Rip the 1×4 into strips and screw-and-glue them in the corners.

Then glue the corners together to create the box.
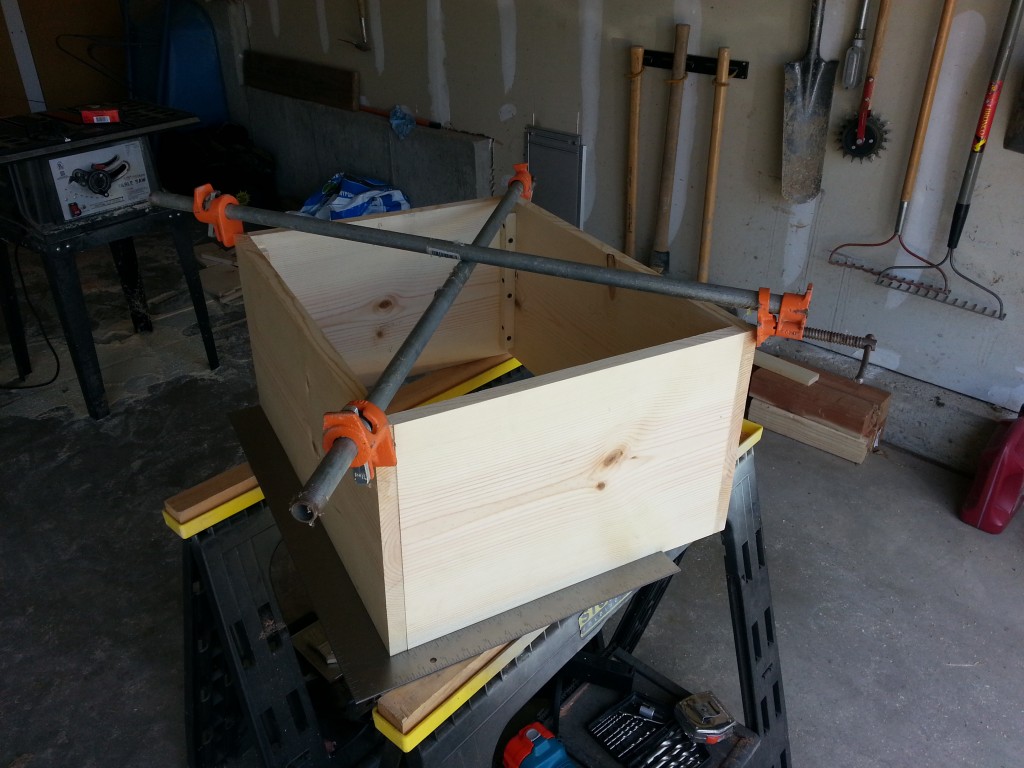
Glue-n-screw furring strips around the rest of inside of the cabinet. Note how I pre-drilled holes in the furring strips. This was a good idea for the FRONT of the cabinet, but not the back. The front, I wanted to screw from the inside, but the back then cannot be. It has to be screwed from the outside. Oops! So now I have to add nuts to the inside furring strip to hold the back on. Do not do this when you build yours…
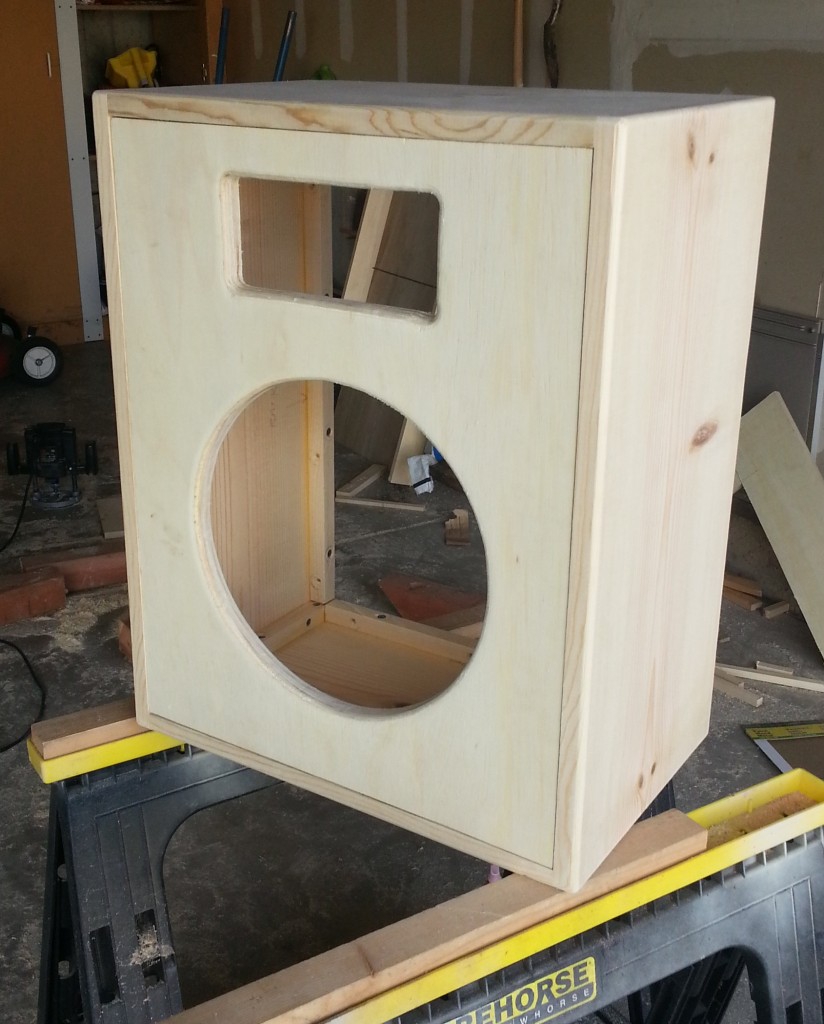
The picture below shows the cabinet box after belt sanding the sides and routing the corners to round them over. I used a 1/4″ round-over router bit. Next time I’d try a 1/2″ round-over bit since standard metal cabinet corners match that radius. Using the size I did means that I cannot really put metal corner protectors on this cabinet–and it’s soft pine. Longevity could be an issue if this cabinet gets transported much.

Trial-fitting the front baffle board with speaker and port holes cut and rounded. Looking good so far… This baffle board will be spray painted flat black on the front to make sure the light wood doesn’t show through the speaker grill cloth.
Time to paint the baffle board and finish the cabinet. I used brush-on Varathane, but was very disappointed with my brushing abilities and brushes. I ended up with bristles in my finish and brush marks galore. It’s the brush’s fault, honest! I spent quite a bit of time sanding a fair amount of finish off and going to a spray can. That worked much better, but I still am not completely happy with my technique. There’s a run and some dry patches but the wood is protected. I would have liked a bit darker finish too. Next time I may use some stain instead of a clear only finish. However, pine darkens with age anyway, and after all it’s about the tone, man!
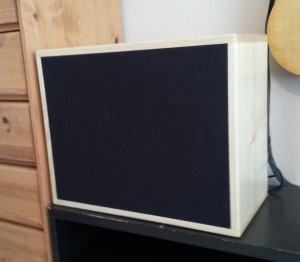
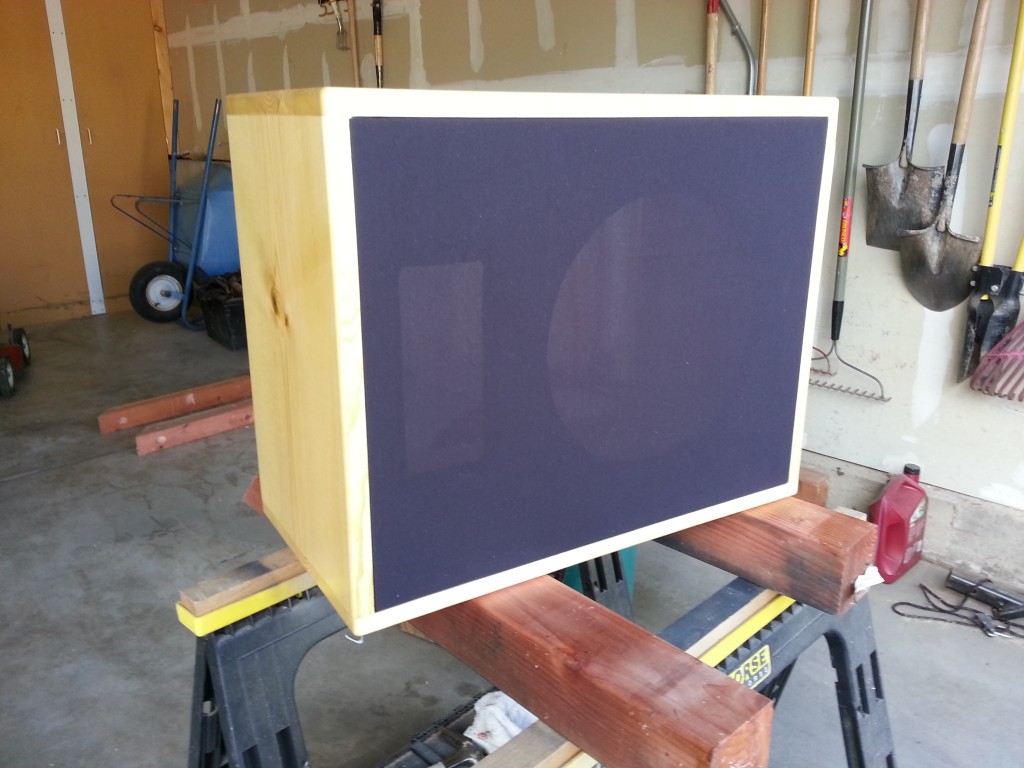
Here is the baffle board, painted with grill cloth in place on the finished cabinet. The grill cloth is simply held in place on the baffle board by spraying adhesive on the back edges, wrapping the cloth around then stapling it. After that, I caulked the baffle board seating surface heavily and screwed the baffle board in place through the pre-drilled holes. It’s not coming off easily–or vibrating. Plus, it’s well sealed.
Here’s the front view at this point.
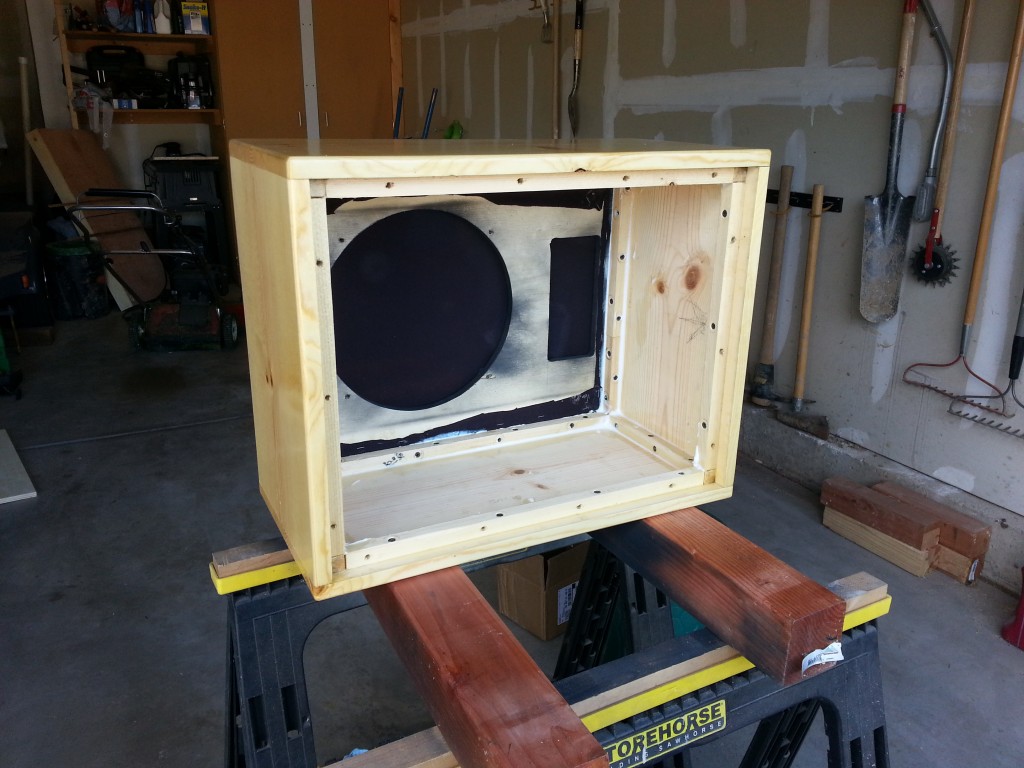
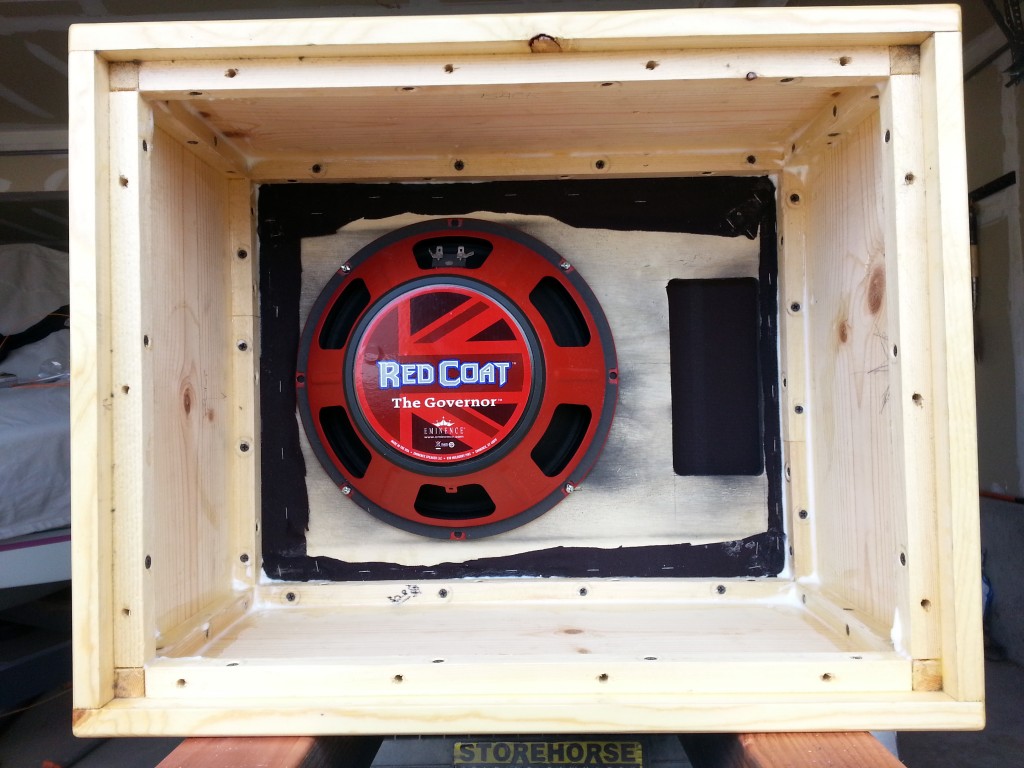
Time to mount “The Governor” in place. There are c-nuts embedded in the front of the baffle board enabling the screws to go through from the speaker side. I glued the c-nuts in place so I didn’t accidentally push them back out again while mounting the speaker. Conceivably, I could’ve just used wood screws to hold the speaker on, but I was afraid they’d eventually strip out of the plywood baffle and wanted it more robust.
There are also c-nuts in the back of the furring strips that will hold the cabinet back in place.
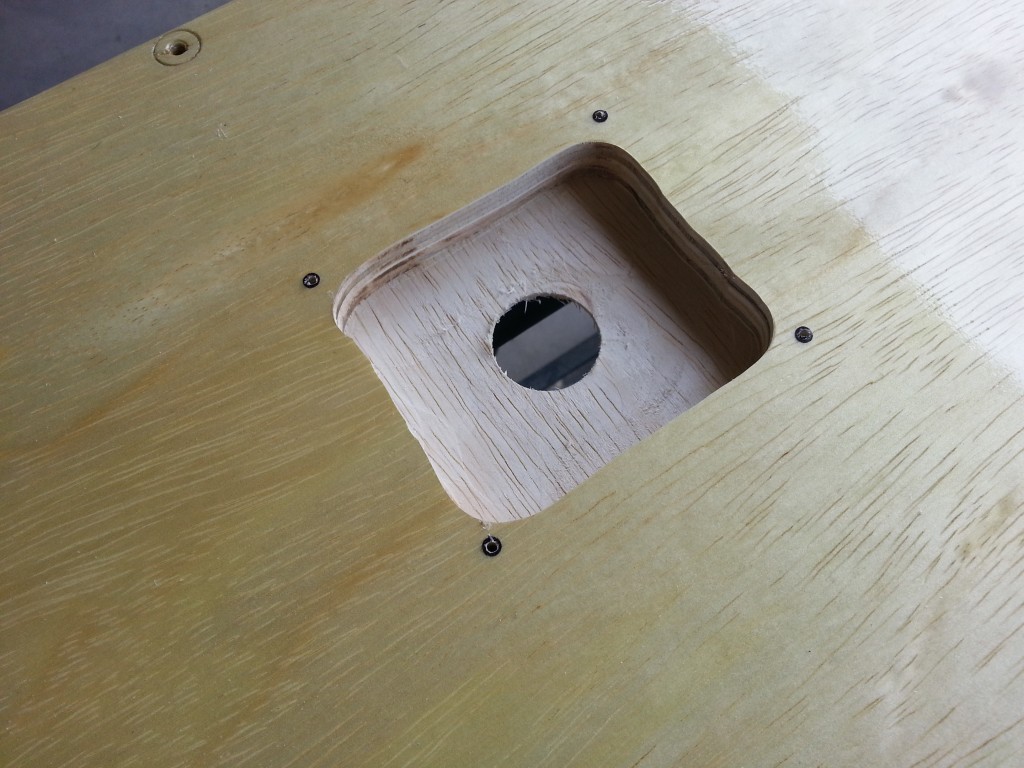
I routed the back for the jack plate and used a hole saw to cut out the remaining material for the jack and wiring to go through. Sloppy routing but effective.
I filled in the edges with caulking and placed the jack plate. No air leakage from behind there! It also won’t come off or resonate that way.
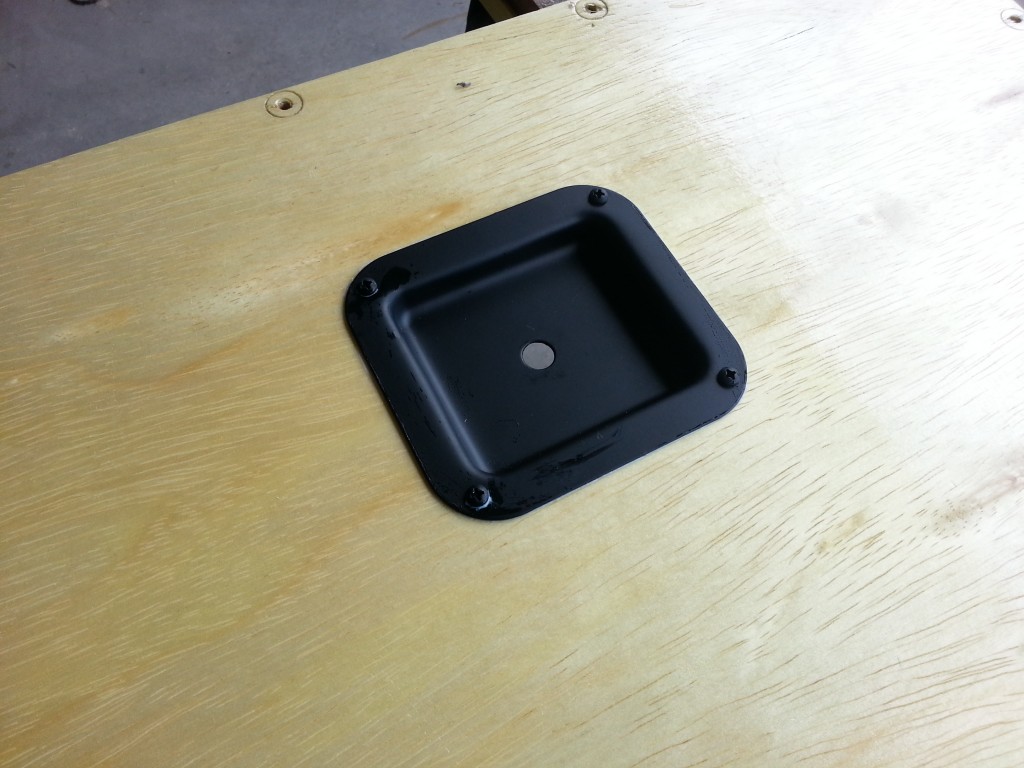
Again, here’s the front view:

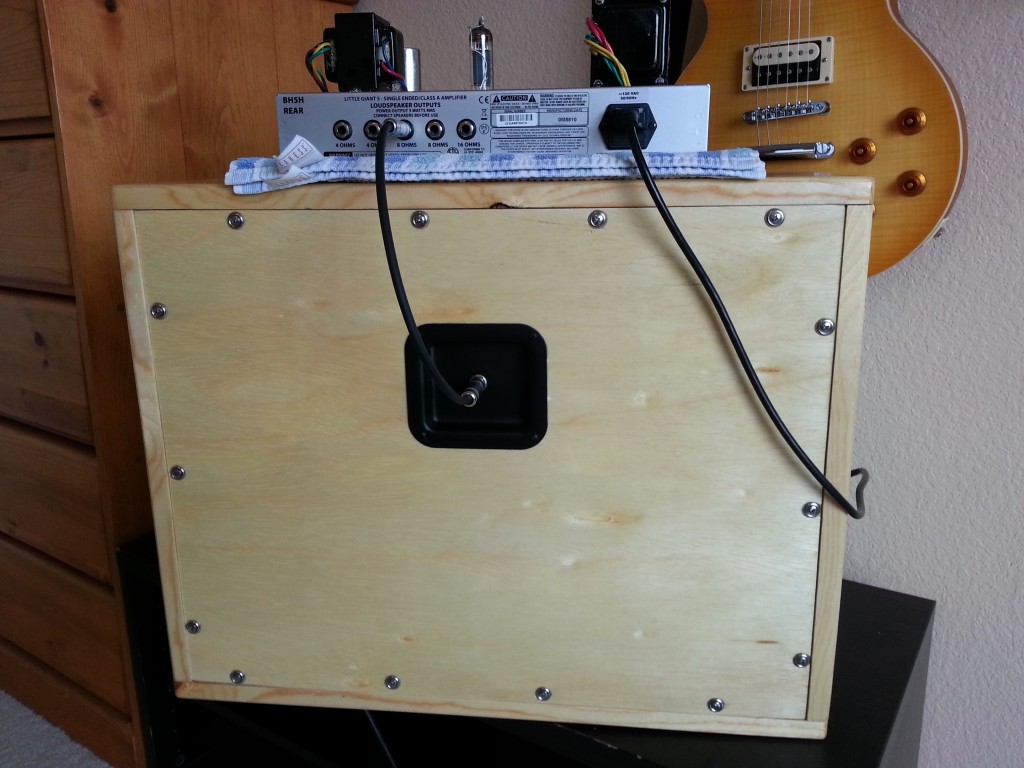
And the back view, with a naked Blackheart Bh5h sitting on top (more on that later):
The Results
So how does it sound, you ask? Well, the sealed, ported cabinet took all the “flubbiness” out of the speaker and cleaned up the sound quite a lot, staying smoother through much more volume range. It also boosted the bottom end so it’s nice and well-rounded. Now I can hear that I have to do some more work on the amp to tweak the EQ a bit. But overall, I’m extremely happy with the improvement in tone. Additionally, it’s REALLY loud! I don’t have to turn the amp up as high (maybe 2-4) to have the room rockin’ which gives me enough clean headroom at that volume to do some recording. Stay tuned for another post with sound samples.
Now let’s get down to some playin’!
The bass resonate frequency of the cabinet should be above the low resonate frequency of the speaker or you will hit the peak frequency and wow this is really a bad thing im hearing.
I wish you had tried a wizard , without the port on the cabinet maybe.
If that speaker gets replaced again i will understand the gritty tone isnt for you either.
NICE JOB ON THAT CABINET for real.
Thanks for posting your project. I appreciate anyone that shares their experience, success and struggles. I have a working 1940’s Bogen tube amp and now I need a cab. Yours was the first project I came across. Nice job!!!
I’m more a wood worker than guitar player. I’m doing research in preparation of building my own cabinet. The design I have come up with is quite a bit more complicated and is based on Forte cabs 3D cabinets with some tweaks. I may give that spreadsheet a try to see how it reacts.
A note on the finishing. I would recommend that in the future you use a “wipe-on” varnish or poly. It is basically a varnish thinned down to the point that you can just wipe it on with a rag. It’s very user friendly, so you dont have to be a finishing expert to get the desired results That will eliminate your problems with runs and brush marks. The only downside is that it takes several coats. I usually apply 4-6 for a good build-up.
“I’d have a cabinet tuned for my “The Governor” speaker with a cutoff frequency below 82.41 herz, which is the frequency of the low-E string”
can you please elaborate on ths regard… i mean eminence website says your speaker has usable range of 80Hz – 4.2kHz and resonance (Fs) at 101 Hz …so, your port is tuned to the “minium” usable frecuency?? thats the way of tuning the ports?
Im asking because i made a ported 2×12 cab tuned to 90hrz (resonance Fs of my lil texas speakers), but adding little tubular inserts i can tune it to 70 Hrz (usable range is 70Hz -5.5 KHz) but didnt know exactly wich is the correct frecuency to tune it… somewhere i readed guitar cabs must be tuned to resonance (Fs) ot hery sound “weak” but all over the internet says ports tunes to lower desired frecuency (but not guitar specific)
PLUS this posted by James Ilish “The bass resonate frequency of the cabinet should be above the low resonate frequency of the speaker or you will hit the peak frequency and wow this is really a bad thing im hearing.”
any help about this is really apreciated… many thanks!
Hello, wow you did a great job!
Do you know any website where I can buy the materials for Cabinet? I explain my self better, basically I got a Plexi Marshall but the 4X12 it’s another brand and it doesn’t match with the Marshal head, I don’t want to change this cabinet, I just want it match with the head.
Thanks so much in advance for the tip.
regards.
Hello Todd
I would appreciate some advice on how to build a speaker cabinet which I can use in a stack with my open-back Marshall DSL 15C Combo amp (15W, all valves; Celestion G12E-60, 12″, 60Watts/16Ohms).
I have read your post and am using your calculation spreadsheet to try to find out where to start.
I am still trying to find out what the most suitable type of cabinet for my amp would be: open-back, closed-back/sealed or closed-back/front ported like yours?
I am a bit confused, because someone told me that a closed cabinet would be less “loud” than the open-back amp and that I would have to look for a speaker “louder” than the one in the amp. But that doesn’t really help me.
Thanks for shedding some more light on this issue
Best regards
Lorenz
Hi Todd,
I m just about to start building your cab design for my Eminence Governor. I was just wondering if there were any improvement s you d thought of after using and listening to the cab. ?
Best Regards
Rodge.
Hi, I am attempting to build my own 1×12 cabinet to put a Celestion G12H Anniversary driver into. I am however having little luck finding all the necessary specifications to get proper calculations from the speaker box enclosure design calculator at http://www.diyaudioandvideo.com/Calculator/SpeakerBoxEnclosure/. I am using the Fs and Fb of 85hz from http://celestion.com/product/17/g12h/ using the 305mm cone diameter from the same site. However I cannot find any Equivalent Volume (Vas) or Total Q (Qts) specifications on the Celestion website. I cannot find the Qes or Qms to calculate the Qts and I cannot find any Equivalent volume specifications. Will someone please help me out!!! I have the speaker and wood, I want to jam!!!
Great details being shared! Hoping to see more of your creations.
Where did the jack plat come from ?
hi todd,
your work looks very professional,nice job I was wondering if you could give me an idea ,I have a 4×12 cab tht’s boomy so I removed the back and was able to eq the amp to something more desireable,my question is what would be a correct size hole to put in the rear panel, any suggestions would be helpful .
thanks mike
Hi Mike,
Thanks for the comment!
Not sure about your cab. I expect if it’s designed to be a closed-back cab and doesn’t have a port. It probably should stay that way. If you’ve removed the back and want to try a baffle-board but open back, many amps use a baffle that comes up a third to half-way up the back. Although, now that I say that out loud, I doubt it would work for a 4×12, since two of the speakers would still be totally exposed.
Good luck!
–Todd
Thanks for the comment!
https://www.parts-express.com/penn-elcom-d0944k-dish-one-1-4-black-4-x-4-3-8–262-324
Thanks,
–Todd
Hi Brian,
As near as I can tell, Celestion doesn’t publish much for their drivers. I can tell you that I found a used V30 and put it in this cab and love it. So I’m currently using the Eminence in my Line 6 amp.
Thanks,
–Todd
Hi Roger,
Thanks for your question. As far as what I’ve done since this post… I added a folded up bath towel inside, since I didn’t have any fiberglass speaker stuffing. This was to reduce some echo sensation. When I open it up again, I’ll put in some fiberglass insulation.
The other thing I did was to swap out The Governor and put in a Celestion V30. I found the V30 used for cheap and wanted to try it. The Governor was fine too, but once I swapped them, I thought the sound was even less boomy and liked it.
Other than that, I added rubber feet on the bottom.
Thanks!
–Todd
Hey Lorenz,
I’m no expert, so take my comments with a grain of salt…
The open/closed/ported question is really better answered by which speaker driver you purchase. Also, in my case, I WANTED a closed back cab because it’s easier to control the sound in a recording and live scenario (with microphones).
As far as the “loudness” part, I’m not certain what that means. For sure an open back sends sound out the back as well as the front and can be perceived as “loud” for sure. In my case, I use my cab on stage in a stand (pointing at me), so with an open back cab, having it loud enough for me to hear over the drummer ends up so the sound guy hears just me. But I’m not sure why that’s such a bad thing… 😉
I hope that helps a little,
–Todd
Thanks for your comment!
Regarding the cutoff frequency, I wanted a cabinet that would adequately reproduce a good, strong low-E. Hence the reason I chose that frequency. I was already suffering from “boomy-ness” so I didn’t figure I needed more low end. But I’m not really a speaker guy. I just ended up with something I like based on the voodoo calculations I did… 🙂
Basically, I Googled until I found something that matched what I was thinking. No promises it’ll work for anyone else though.
Good luck!
–Todd
Just by chance I ended up with a speaker cab the same dimension and material. It’s 2.1 cubic feet inside. I only have one speaker though, a EV12L. I made another cab with 2.5 cubic feet inside to accommodate a 15 inch JBL D130 Lansing. I’ve had to deal with boominess before and certainly don’t like it, so I was going to try insulation. I saw your ports and decided I’m gonna try those on the 12 inch cab. If I don’t like them, I can always cover them. I think I’ll use a minimum amount of insulation, too. I’ve placed my speaker in the middle of the baffle, so I’m going to try using two ports half the size of yours on each side of the speaker. I’m also going to use a sealed cab (closed back). A ported cab is more noticeable in a bass cab because of the longer movement of the speaker cone. When the cone moves back toward the magnet, a sealed cab will slightly pressurize and restrict the backward movement of the cone. The ports alleviate that. Air moves through the ports and pressure remains the same inside and outside the cab. I’m not sure of the port dimensions for a tuned cab, but I’ll try different dimensions until I like the sound. For those of you playing bass, the Ampeg B series are absolutely the best cabs out there. That’s B15 and B18. Unexcelled.
Good Reading! Has anybody tried working a BOSE style bass response into a low volume guitar cabinet? If so what wattage, I’m looking for 5W – 15W results. Also different speaker sizes 10″, 8″ etc.
Hey Todd, Looks beautiful. But from a technical standpoint I am not sure how well this will work long term. I got this directly from Celestions website:
THIELE SMALL PARAMETERS:
Thiele Small parameters are useful for controlling the low frequency response of sealed or ported cabinet systems by changing the cabinet internal volume, and port dimensions. However they are of severely limited use when designing a guitar speaker cabinet.
Electric guitar speakers do not reproduce ‘low’ frequencies (the low E string of a lead guitar has a fundamental of 82Hz) and so the frequencies at which Thiele Small parameters have significance are mostly below the operating range.
Also, the parameters are measured at very small signal levels. Guitar speakers become non linear at very low levels compared to other types of speaker, greatly reducing the significance of Thiele Small parameters in actual speaker use. Using the Thiele Small parameters of a typical guitar speaker, you will find that halving or doubling the cabinet size makes minimal difference to the response.
They have no relevance to open back cabinets.
Guitar speakers are not recommended for use in ported cabinets (as the increase in cone excursion below the tuning frequency can cause the thin paper edge of the cone to tear).
Hope this helps….
Personally from my experience pushing a 12” speaker with a 5 watt amp was the likely cause of your flubbiness.
I think an 8″ or a 10 would have allowed you to go open back. Closing up the back was a good choice for your combination though.